 Pin This
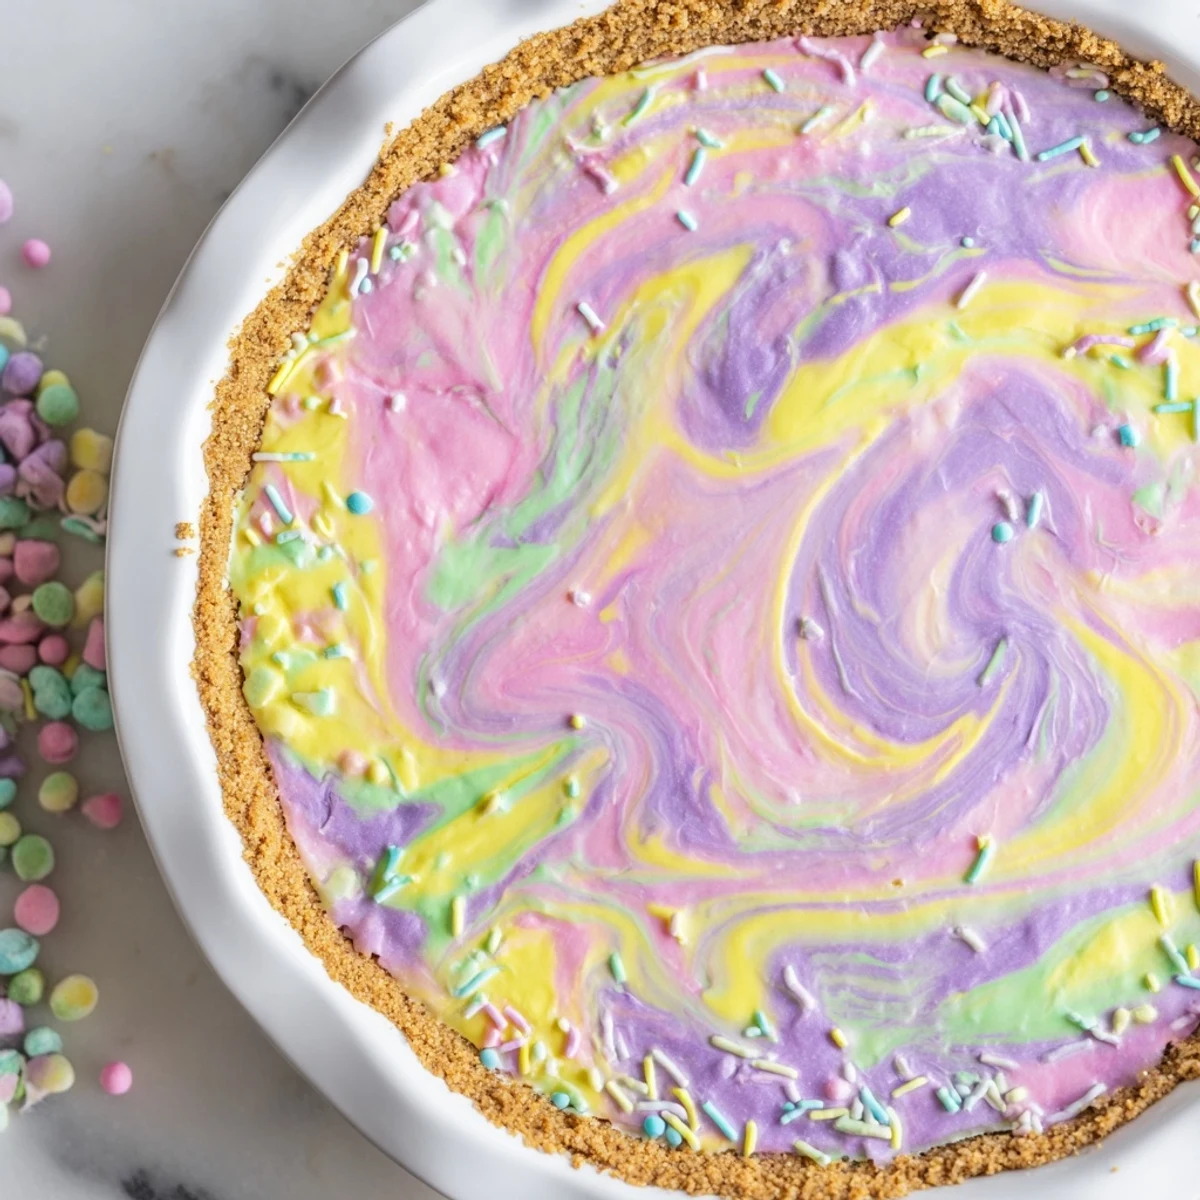
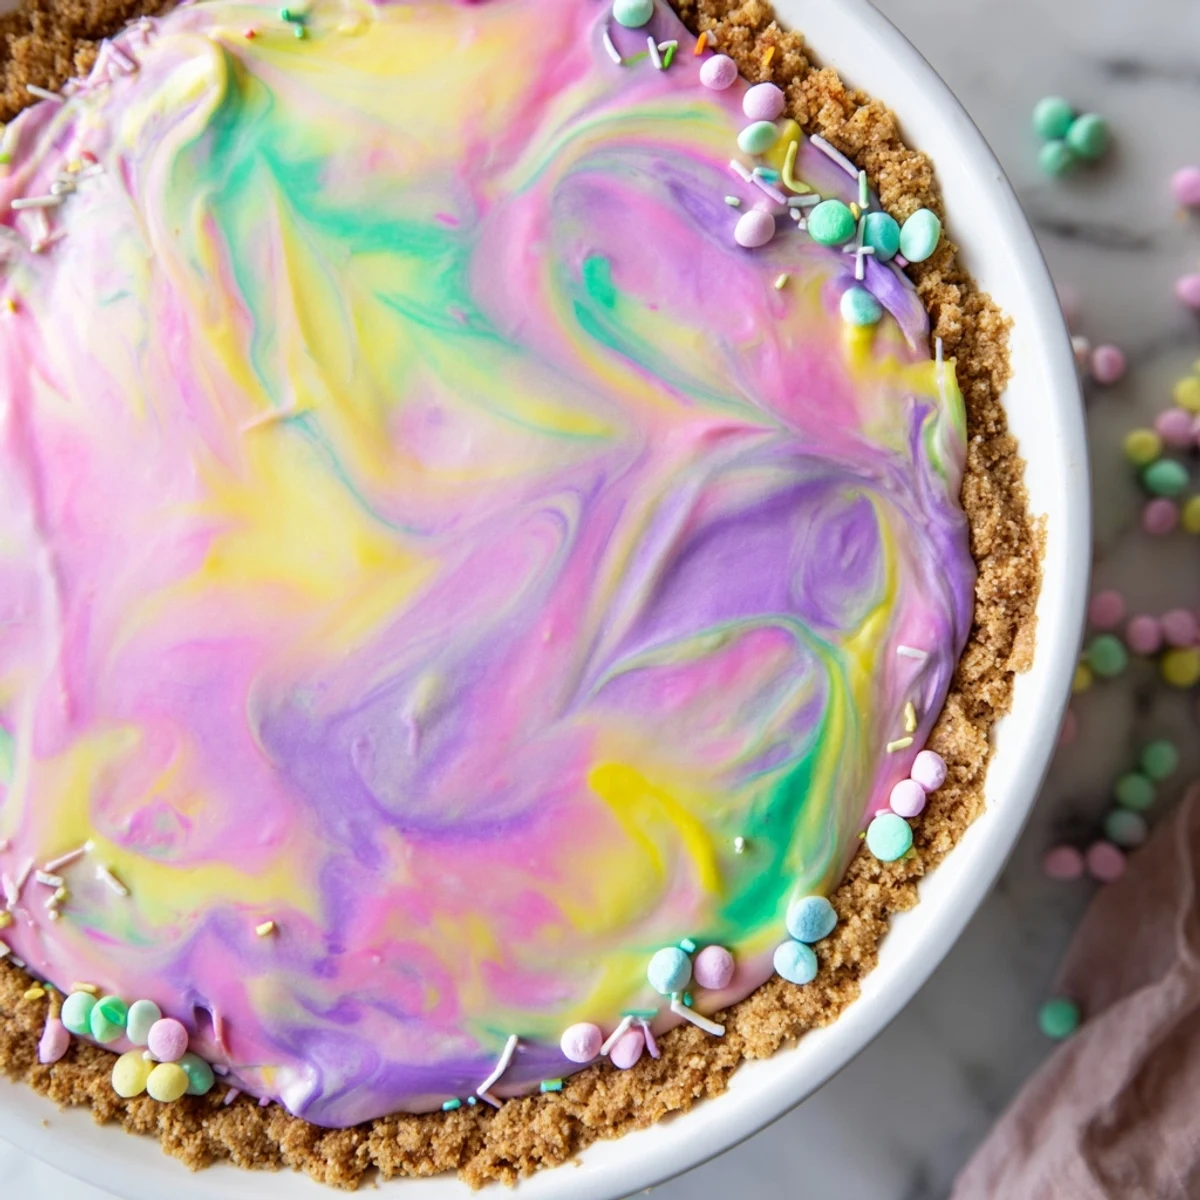
 This vibrant dessert features a luscious blend of cream cheese and mascarpone with whipped cream, creating an irresistibly smooth vanilla base. The filling gets divided and tinted with soft gel food coloring—think gentle pinks, lavenders, mint greens, and buttery yellows—then artfully swirled together to create that signature marble effect. Pressed into a golden graham cracker crust and chilled until perfectly set, each slice reveals beautiful ribbons of color. The contrast between the crisp, buttery base and silky filling makes every bite memorable.
The first Easter I hosted my own dinner, I wanted something that felt like spring itself decided to show up on the dessert table. I was scrolling through recipes at midnight, exhausted but determined, when this pastel swirl idea stopped me cold. Something about dropping those soft colors into cream cheese filling felt like painting a tiny edible canvas. My kitchen ended up looking like a pastel explosion, but watching those colors marble together was pure magic.
My aunt took one bite and actually gasped, then spent the next ten minutes interrogating me about my secret culinary training (which consists entirely of watching too much Great British Bake Off). The best part was watching the kids gather around the counter, eyes wide, as I dropped those first dollops of colored filling into the crust. Now its the one request I get before I even ask what anyone wants for Easter dessert.
Ingredients
- Graham crackers or digestive biscuits: Crush these to fine crumbs for a crust that holds together beautifully without being rock hard
- Unsalted butter: Melt this completely and toss it with the warm crumbs if possible, it helps everything bond
- Cream cheese: Absolutely must be room temperature or you will fight lumps that simply will not disappear
- Mascarpone cheese: This is what gives the filling that sophisticated European creaminess beyond ordinary cheesecake
- Powdered sugar: Sift this first because nothing ruins a dreamy filling like tiny sugar clumps
- Vanilla extract: Use the good stuff here since vanilla is the primary flavor supporting all those pastel swirls
- Heavy cream: Cold from the fridge is best for whipping to those perfect soft peaks
- Gel food coloring: Start with one drop then add more gradually because gel is concentrated and unforgiving
Instructions
- Bake the Cookie Crust:
- Crumble your cookies into fine breadcrumbs, melt that butter until it is liquid gold, and press everything into your pie dish with the bottom of a measuring cup for even coverage. Bake at 180°C (350°F) for about 10 to 12 minutes until it smells like toasted happiness, then let it cool completely because hot crust melts filling and that is a sad situation nobody wants.
- Whip the Creamy Filling:
- Beat your room temperature cream cheese, mascarpone, powdered sugar, and vanilla until the mixture is smoother than a calm lake. In another bowl, whip your cold heavy cream until it forms soft peaks that barely hold their shape, then fold it into the cheese mixture like your life depends on being gentle.
- Create Pastel Magic:
- Divide your beautiful white filling between three or four small bowls depending on how many colors you are using. Add one tiny drop of gel coloring to each bowl and fold it in until you have these soft, dreamy pastel shades that look like spring mornings.
- Swirl and Chill:
- Drop random dollops of each colored filling all over your cooled crust, then drag a skewer or knife through them in gentle curves to marble everything together. Resist the urge to keep swirling or you will end up with muddy grayish filling which tastes fine but defeats the whole pastel point, then refrigerate for at least 2 hours until set.
 Pin This
 Last year my neighbor caught me through the window, spoon hanging midair as I debated whether to add one more swirl of purple. She ended up staying for coffee and we ate the first slice together straight from the pie dish, standing at the counter because waiting for proper plating seemed ridiculous. Some desserts are meant to be celebrated immediately.
Getting the Swirl Just Right
The trick is dropping your colored dollops randomly rather than in any pattern, because trying to be too artistic usually backfires into something that looks manufactured. I learned that running my skewer through the filling in one continuous motion, never lifting it, creates the most natural marble effect. Think lazy river rather than deliberate geometric shapes.
Making It Ahead
This pie actually tastes better after sitting overnight, which makes it the ultimate dinner party lifesaver. The flavors meld together and the texture firms up into this perfect sliceable consistency that holds its shape beautifully on the plate. Just save the sprinkles for right before serving or they will get sad and soggy.
Serving Suggestions
I love serving this with a cup of chamomile tea because the floral notes complement the vanilla perfectly without competing with the delicate presentation. A glass of cold Moscato works wonderfully too if you are feeling festive and want something a little more celebratory. The pie is rich enough that small slices satisfy everyone, which means it stretches further than you would expect.
- Run your knife under hot water before slicing for cleaner edges that show off those swirls
- Let the pie sit at room temperature for ten minutes before serving for the best texture
- Keep any leftovers covered in the fridge, though in my house this has never been an issue
 Pin This
 There is something profoundly satisfying about cutting into that first slice and seeing exactly how your swirls turned out, like opening a little present you made yourself. Hope your Easter table gets a little more colorful this year.
Recipe FAQs
- → Can I make this ahead of time?
-
Absolutely. This dessert actually improves after chilling, making it perfect for preparing the day before your celebration. The flavors develop and the texture becomes even creamier.
- → What type of food coloring works best?
-
Gel food coloring is ideal because it provides vibrant pastel shades without adding excess liquid. Liquid food coloring can make the filling too thin, affecting the final texture.
- → How do I achieve the perfect marble swirl?
-
Spoon dollops of each colored filling randomly rather than in sections. Use a skewer or knife to make gentle figure-eight motions, only passing through the filling once or twice. Over-swirling blends colors together rather than creating distinct marbling.
- → Can I use a different crust?
-
Yes. While graham crackers provide classic flavor, digestive biscuits, vanilla wafers, or even gluten-free cookie crumbs work beautifully. Just adjust the butter slightly to achieve the right pressable consistency.
- → How long should I chill before serving?
-
Minimum two hours for proper setting, though three to four hours yields cleaner slices. The filling firms up nicely while maintaining that luxurious creaminess.
- → Can I freeze leftovers?
-
Yes, freeze individual slices wrapped tightly in plastic and foil for up to a month. Thaw overnight in the refrigerator for best results—the texture remains remarkably creamy.
