 Pin This
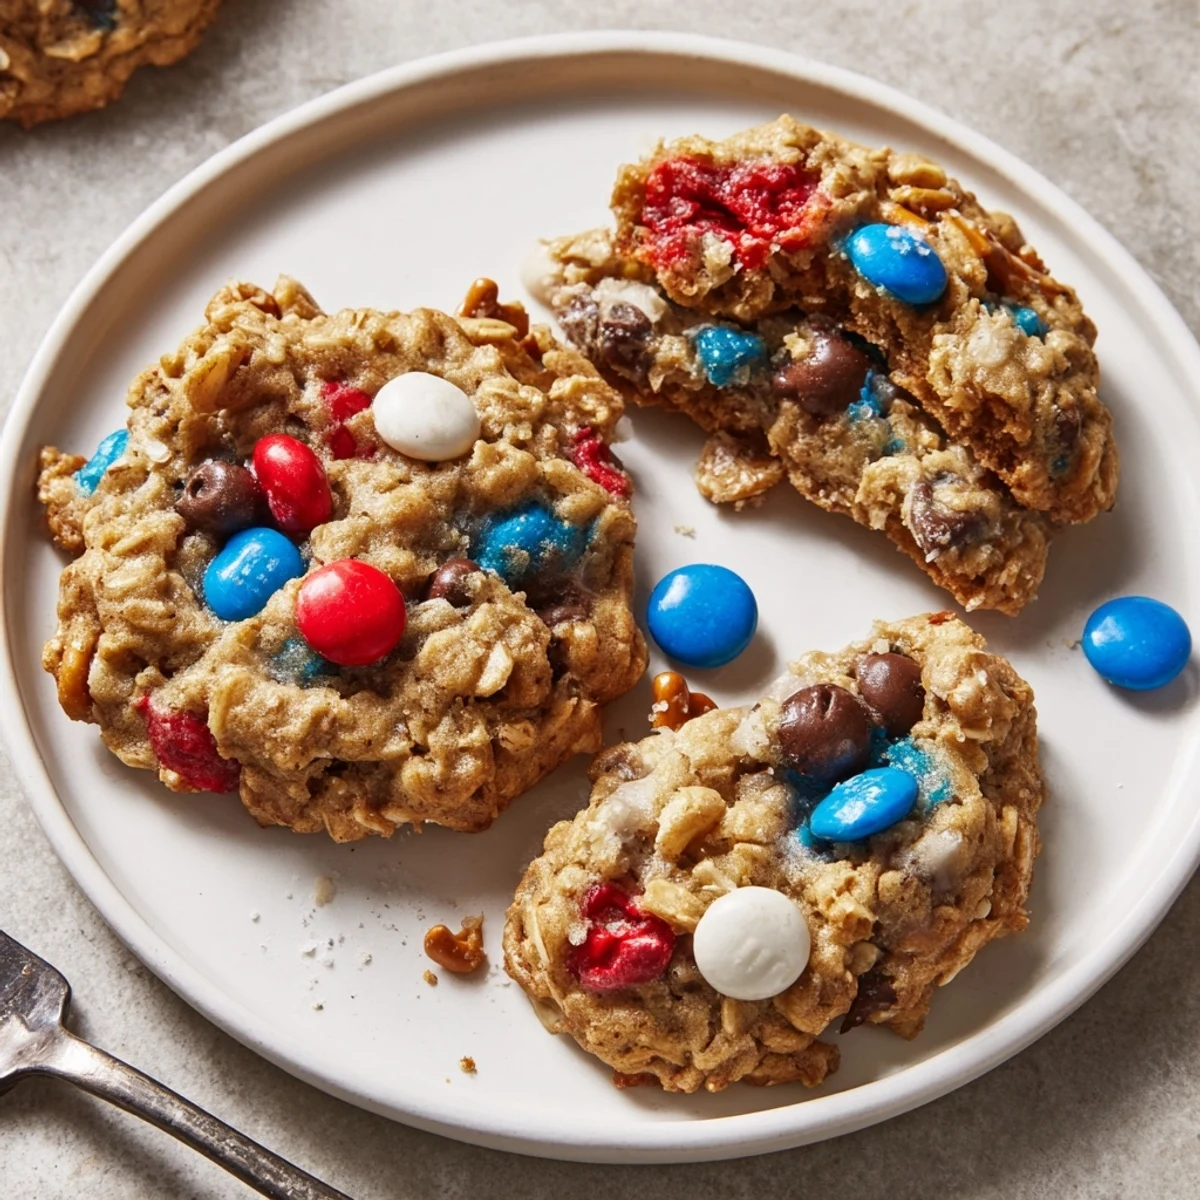
 These chewy Patriotic Monster Cookies blend old-fashioned oats, creamy peanut butter, semisweet chips, and red, white, and blue candies for a crowd-pleasing treat. Cream butter and sugars, add peanut butter and eggs, fold in dry ingredients, then stir in chips and candies. Scoop onto parchment and bake 10–12 minutes at 350°F; cool briefly on the sheet for optimal chew.
The snap of a mixing spoon against a glass bowl, the mingling aroma of melting butter and peanut butter, and the thrill of scattering jewel-toned candies across dough—these monster cookies always turn my kitchen into a little celebration. I came across this recipe just before a Fourth of July picnic, when I wanted something festive but not fussy. There&apo;s nothing quite like the playful colors dotted through every chewy bite; it&apo;s nearly impossible not to smile when you see them lining up on the baking tray. Even after countless batches, the anticipation of pulling a tray of warm, soft cookies never gets old.
These cookies first made their grand debut at our annual neighborhood block party, where half the fun is seeing who can sneak the most without being caught. I remember laughing as we gathered outside, crumbs dusting our fingers and nobody minding the sticky smiles. The kids immediately sorted their cookies by candy color, while the grown-ups just reached for seconds before they cooled. I ended up being asked for the recipe so many times, I started carrying extra copies on my phone.
Ingredients
- Unsalted butter: Soft butter blends smoothly—take it out before you do anything else so it&apo;s actually soft when you need it.
- Granulated sugar: Keeps the cookies crisp at the edges and balances the brown sugar&apo;s molasses note.
- Light brown sugar: Adds chew and that deep caramel flavor that just makes the dough.
- Creamy peanut butter: Choose creamy for the best mixing; natural versions work but the texture will be rustic.
- Large eggs: Room temperature eggs incorporate more easily and help the cookies puff just right.
- Vanilla extract: A splash amplifies every other flavor, so don&apo;t skip it.
- Old-fashioned oats: These give the cookies their signature chew; quick oats will dry things out.
- All-purpose flour: Always spoon the flour gently into your cup—too much makes the dough tough.
- Baking soda: Gives the cookies a subtle lift and spaces out the candies.
- Salt: Just enough to wake up the sweetness.
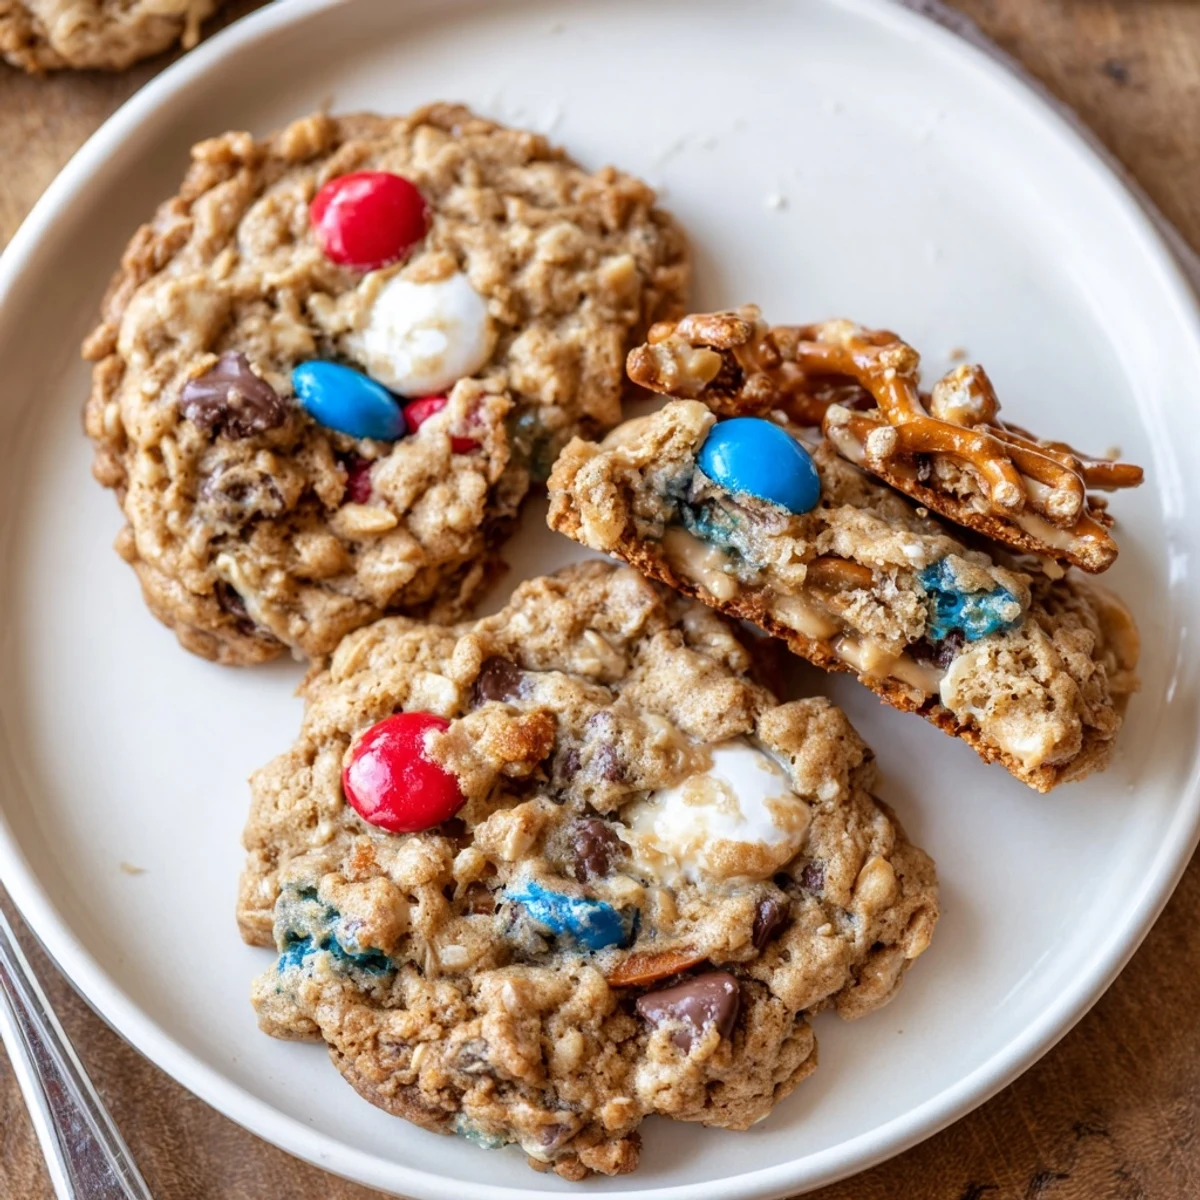
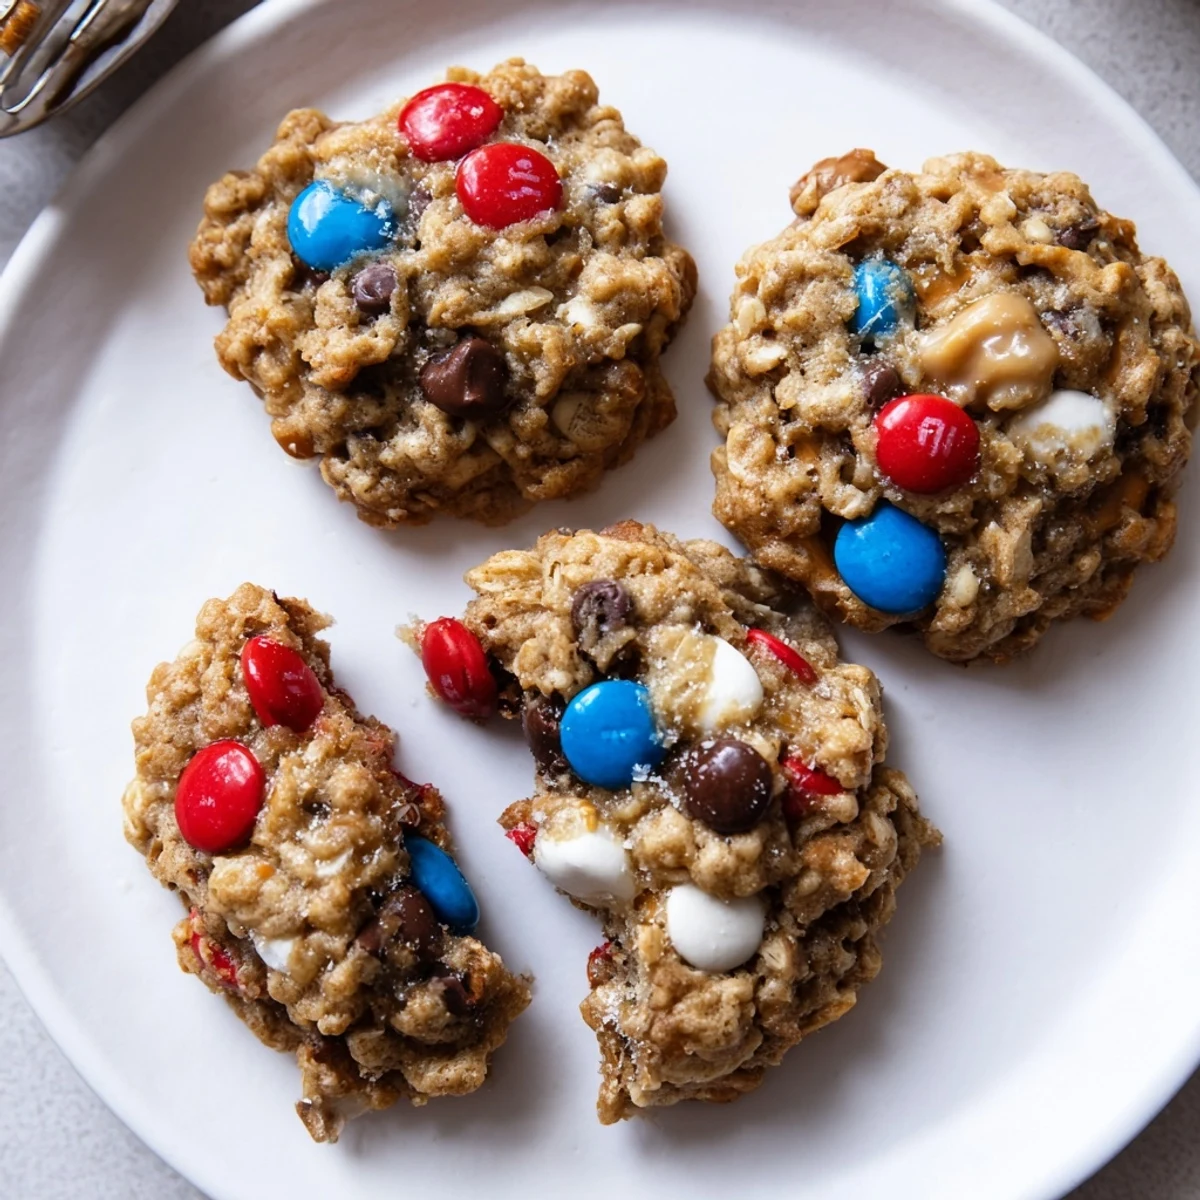
- Red, white, and blue chocolate candies: The stars of the show, press a few on top right before baking.
- Semisweet chocolate chips: Pools of melty chocolate balance every bite; try minis if you want extra bits in the mix.
- Mini pretzels (optional): Crush them gently so you get shards, not powder, for that salty-sweet snap.
Instructions
- Heat things up:
- Preheat your oven to 350°F (175°C) and line two baking sheets with parchment so nothing dares stick.
- Cream and dream:
- In your largest mixing bowl, beat together the softened butter, granulated sugar, and brown sugar until it&apo;s pale and fluffy—think whipped caramel clouds.
- Add peanut butter & eggs:
- Scoop in the peanut butter, then crack in the eggs one by one, beating after each until glossy. Finish with the vanilla; stand close to inhale that scent.
- Mix your dry team:
- In another bowl, whisk together the oats, flour, baking soda, and salt, watching the flecks swirl together.
- Combine with care:
- Slowly add the dry mix to the wet, letting the dough form with as little stirring as needed to keep things tender.
- Candy and crunch:
- Fold in the red, white, and blue candies, chocolate chips, and pretzel bits (if using)—a few turns should do it, leaving streaks of color throughout.
- Scoop and space:
- Drop rounded tablespoons of dough onto the trays, giving each dollop space to spread and mingle.
- Bake to just golden:
- Bake for 10 to 12 minutes, rotating if needed, until edges barely turn golden while middles stay soft.
- Wait (just a bit):
- Cool on the baking sheets for 5 minutes before easing them onto a wire rack with a spatula; resist eating immediately if you can.
 Pin This
 There was one year my cousin tried to swipe a warm cookie straight off the tray, melting chocolate streaking her shirt as she giggled through a mouthful. At that moment, the cookies became more than an easy dessert—they were the centerpiece of our post-fireworks kitchen cleanup and laughter. Now, it&apo;s tradition for someone to sneak an early taste, no matter how many warnings about hot chocolate chips.
Getting the Texture Just Right
I learned the golden rule: stop baking the moment the edges brown, even if the centers look underdone. As they cool, the cookies finish setting, leading to that perfect outer chew and soft middle. The oats continue to absorb moisture, which means the next day&apo;s cookie might be even better. Overbaking might feel safer but leaves you with dry disappointment, so trust the process.
Substitutions and Swaps I Swear By
Not everyone likes peanut butter, so swapping almond butter or even sunflower seed butter works wonders and keeps things allergy-friendly. If you want to make it gluten-free, use certified oats and your favorite all-purpose gluten-free flour blend. White chocolate chips or chopped, roasted nuts bring a delicious new twist without losing the festive crunch. Keep an open mind—that&apo;s how my pretzel addition became a new favorite.
Little Ways to Make Them Yours
The fun comes in tweaking these cookies to mood or occasion, especially with mix-ins. Try pastel candies for spring or swap in caramel pieces for salty-sweet lovers. Each batch turns into a canvas for whatever brings a spark to your snack table.
- A sprinkle of flaky salt on top before baking is next-level.
- If you love extra goo, pull the cookies just as the centers begin to puff.
- Don&apo;t forget to stash a few in the freezer for surprise celebrations.
 Pin This
 Here&apo;s to warm cookies, festive colors, and the sound of friends sneaking bites before dessert is truly served. Make a batch just because—they never last long enough to regret it.
Recipe FAQs
- → How do I keep the cookies chewy?
-
Slightly underbake by a minute or two, use a higher ratio of brown sugar and peanut butter, and let cookies cool on the baking sheet for 5–10 minutes to finish setting. These steps lock in moisture and yield a chewier center.
- → Can I swap peanut butter?
-
Yes. Almond butter or sun butter work well in a 1:1 swap, though texture and flavor will vary. Thicker nut butters produce a firmer cookie, while runnier spreads may require a brief chill before baking.
- → How do I prevent excessive spreading?
-
Chill the dough for 15–30 minutes, avoid over-creaming the butter and sugars, and ensure measured flour is accurate. If needed, reduce oven temperature by 10–15°F and space scoops well apart.
- → What’s the best way to store or freeze them?
-
Store cooled cookies in an airtight container at room temperature for up to 4 days. Freeze baked cookies between sheets of parchment in a sealed bag, or freeze raw scooped dough on a tray then transfer to a bag; bake straight from frozen, adding a couple minutes to the bake time.
- → How can I make a gluten-free version?
-
Use certified gluten-free old-fashioned oats and a 1:1 gluten-free all-purpose flour blend. If your blend lacks xanthan gum, add a small amount (about 1/4 tsp) to help with structure and chew.
- → Are there easy mix-in substitutions?
-
Yes—swap candies for white chocolate chips, chopped nuts, or dried fruit. Omit the crushed pretzels for a softer texture or replace them with toffee bits for added crunch and flavor contrast.
