 Pin This
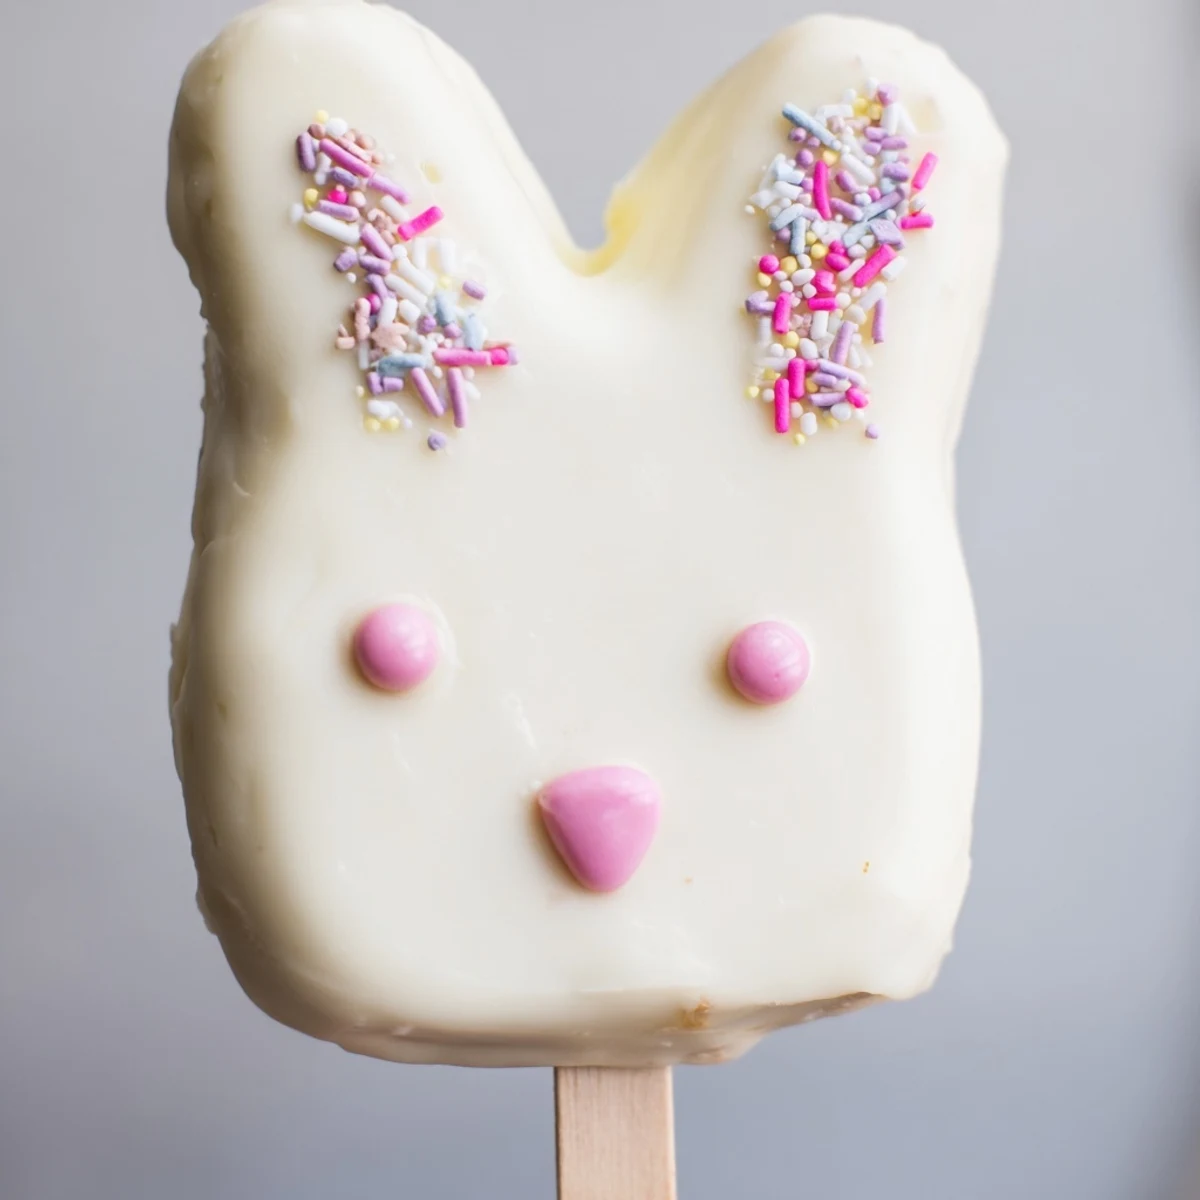
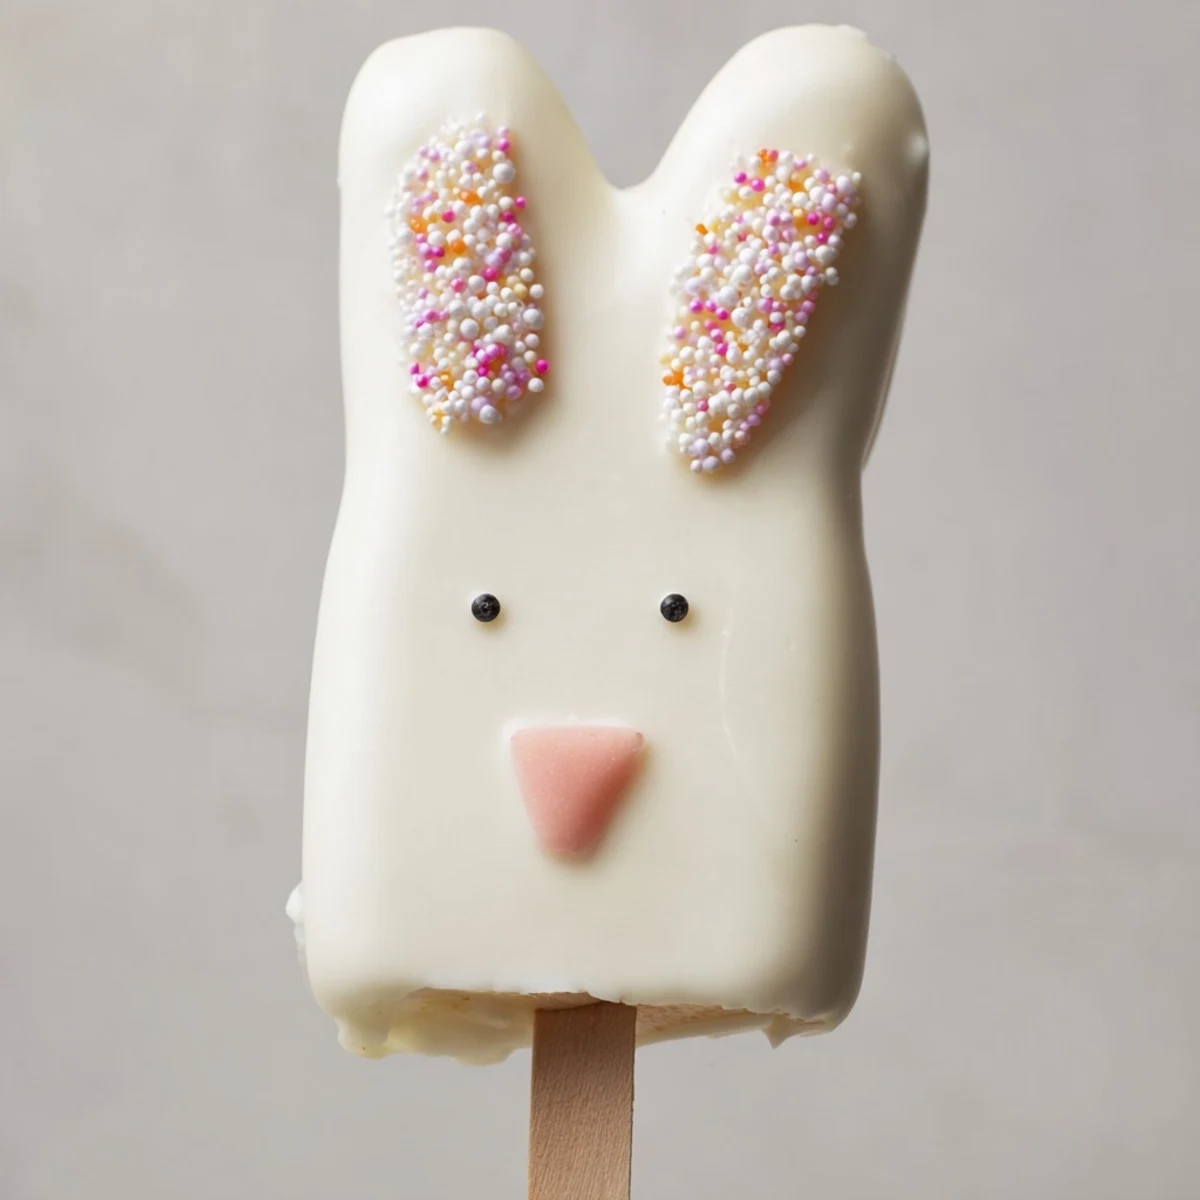
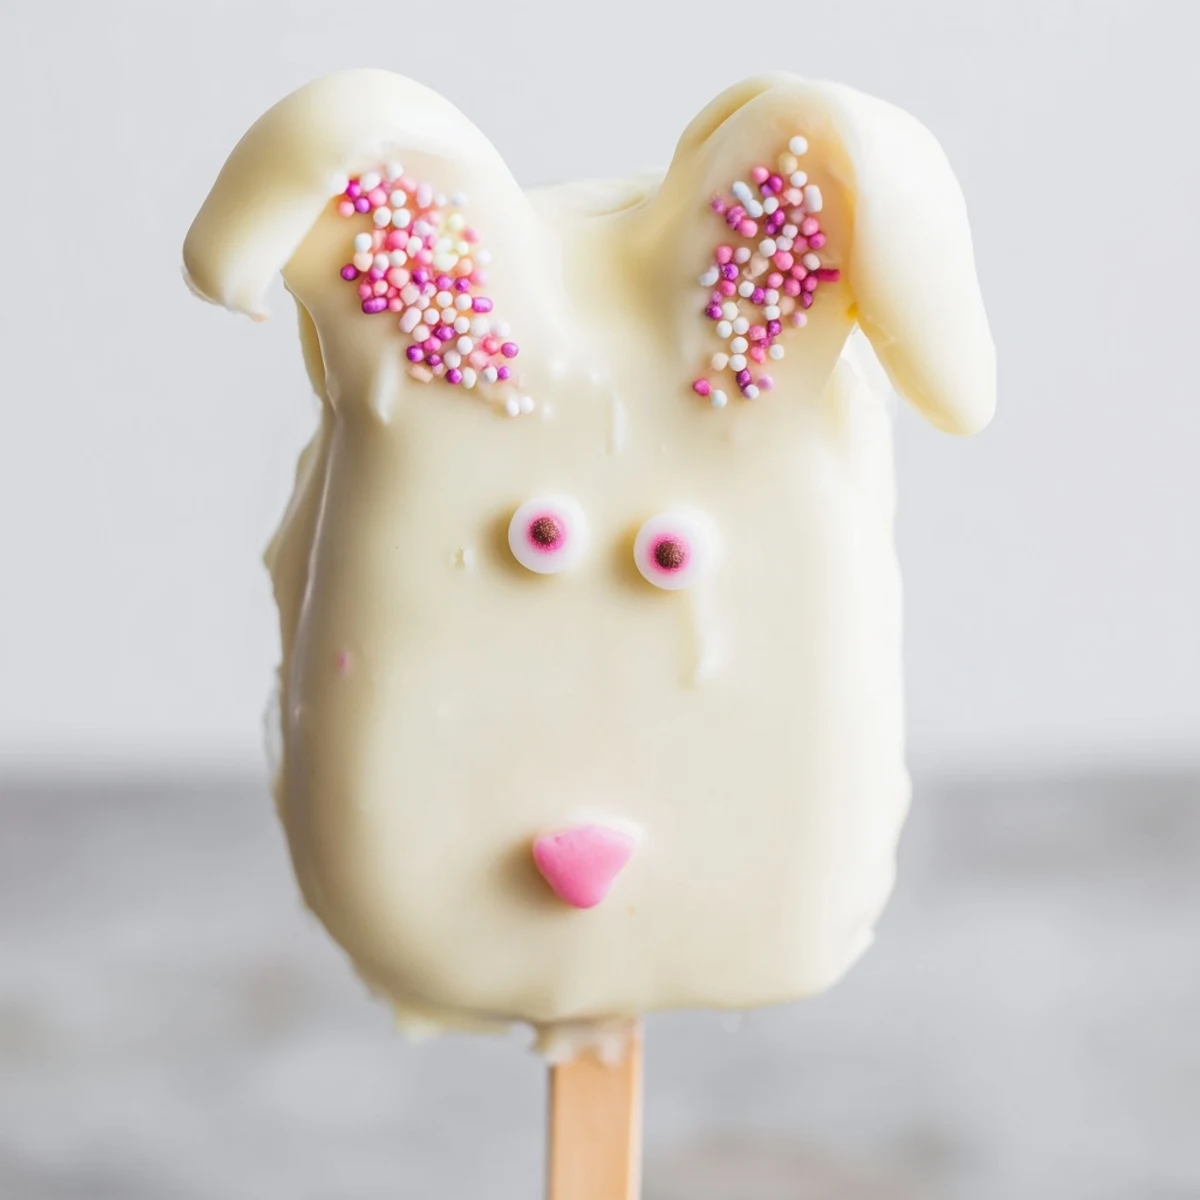
 These delightful bunny-shaped cakesicles combine moist vanilla cake crumbs with cream cheese and butter, coated in smooth white chocolate. Perfect for Easter gatherings, each treat takes about an hour from start to finish and yields eight adorable portions. The process involves mixing cake crumb dough, shaping into bunny faces, chilling, dipping in melted white chocolate, and decorating with edible embellishments like candy eyes and fondant ears.
The kitchen smelled like vanilla and anticipation when I first attempted these bunny cakesicles for my niece's Easter egg hunt. I was convinced I would somehow ruin them, but there is something so forgiving about mixing cake crumbs with frosting and dipping it in chocolate. My mistakes just looked like artistic bunny personality quirks.
Last year I set up a decorating station with bowls of sprinkles and candy eyes, letting the kids personalize their own bunny faces. The kitchen floor was covered in edible glitter, but watching three little cousins seriously debate whether bunnies should have pink or blue noses was worth every sparkly mess.
Ingredients
- Vanilla cake crumbs: Using homemade cake gives you control over sweetness, but honestly a good store-bought vanilla cake works perfectly when crumbled finely
- Cream cheese: Make sure this is properly softened or you will get frustrating lumps that refuse to blend into the cake mixture
- Unsalted butter: Room temperature butter creates that perfect doughy consistency that holds the bunny shapes together during dipping
- Powdered sugar: This sweetens the cake mixture just enough without making it cloyingly sweet once coated in white chocolate
- Vanilla extract: Pure vanilla extract elevates the flavor profile noticeably, so do not skip or substitute with imitation
- White chocolate: Candy melts are easier for beginners, but good quality white chocolate melts beautifully and tastes significantly better
- Edible gel food coloring: A tiny dot goes a long way for pink bunny noses and inner ears, so start with less than you think
- Cakesicle sticks: Insert these at an angle rather than straight up to give your bunnies a slightly tilted, curious expression
- Sprinkles and decorations: Have fun with candy eyes, edible glitter, and whatever else catches your eye in the baking aisle
Instructions
- Mix the cake base:
- Combine cake crumbs, cream cheese, butter, powdered sugar, and vanilla in a medium bowl until the mixture holds together when squeezed
- Shape your bunnies:
- Divide into 8 portions and flatten each into an oval bunny face shape, slightly rounded on top for ears
- Add the sticks:
- Gently press a cakesicle stick into each shape, then refrigerate for 20 to 30 minutes until firm enough to handle
- Melt the coating:
- Heat white chocolate in 30 second intervals, stirring between each burst until completely smooth and glossy
- Dip each cakesicle:
- Submerge each bunny shape in melted chocolate, tapping gently against the bowl edge to remove excess coating
- Decorate while wet:
- Immediately add candy eyes, sprinkle whiskers, or fondant details before the chocolate sets
- Let them set:
- Place on parchment paper for 30 minutes at room temperature or 15 minutes in the refrigerator until completely firm
- Add final details:
- Use food coloring pens or gel to add tiny pink noses or inner ear details once the base coating has hardened
 Pin This
 My sister still talks about the year I made an entire batch with wobbly ears and lopsided smiles. She said they were the most charming Easter dessert she had ever seen because they looked handmade with love instead of factory perfect.
Making Ahead
You can shape the cake mixture into bunny faces and store them in the refrigerator for up to 24 hours before dipping. This actually helps them hold their shape better during the chocolate coating process.
Flavor Variations
Chocolate cake crumbs create a stunning contrast against white chocolate coating. Lemon cake adds brightness that feels especially spring-like, while red velvet makes dramatically eye-catching bunnies.
Storage & Serving
These cakesicles keep well in an airtight container in the refrigerator for up to 3 days. Bring them to room temperature for 15 minutes before serving for the best texture and flavor.
- Place each cakesicle in a clear treat bag tied with pastel ribbon for individual party favors
- Set them upright in a jar filled with edible Easter grass or jelly beans for a gorgeous display
- Have extra white chocolate melted and ready for touch-ups if any cracks develop during storage
 Pin This
 These bunny cakesicles have become our most requested Easter treat, and I cannot wait to see what personalities this years batch develops.
Recipe FAQs
- → What are cakesicles made of?
-
Cakesicles consist of cake crumbs mixed with cream cheese, butter, powdered sugar, and vanilla extract to create a dough-like mixture. The shaped forms are then coated in melted chocolate or candy melts and decorated with various edible toppings.
- → How long do bunny cakesicles stay fresh?
-
Store finished cakesicles in an airtight container in the refrigerator for up to 3 days. For best results, consume within the first day or two when the coating is at its freshest and the interior remains moist.
- → Can I use different cake flavors?
-
Absolutely! While vanilla cake crumbs provide a classic base, you can substitute chocolate, lemon, red velvet, or any cake flavor you prefer. The key is ensuring the crumbs are fine enough to form a cohesive mixture with the binding ingredients.
- → Do I need a special mold for bunny cakesicles?
-
No mold is strictly required—you can shape the mixture freehand into bunny face forms. However, using a cakesicle mold helps achieve uniform shapes and makes the process easier, especially for beginners or when making larger batches.
- → What decorations work best for bunny faces?
-
Candy eyes, edible gel food coloring for noses and whiskers, fondant or modeling chocolate for ears, sprinkles, and even small pretzel sticks work wonderfully. Choose decorations that complement the white chocolate coating while maintaining the adorable bunny theme.
